
Main parts
Juke Box showed here is based on the following main components :
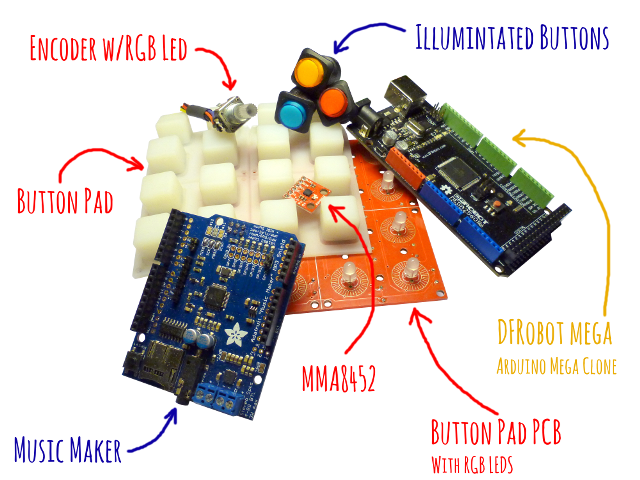
- an Arduino Mega (here a clone from DF Robot) as the “brain”
- an Adafruit Music Maker for music & midi player
- a Sparkfun’s button par and associated PCB (need to get leds separately)
- some simple illuminated push buttons from found at Adafruit
- a rotary encoder. Strangely enough, the RGB one I found at Sparkfun is the only which has a threaded shaft with a bolt and then can be mounted on a chassis
- and last but not least an accellerometer breakout board just for fun also from Sparkfun
Connecting the button pad
Connecting the Arduino to the button pad is not complex but there are quite a bit of wires between them… I already went through this here. But I changed the pins I used in the first place. Just that I thought it would simplify soldering later on by keeping related pins together as much as possible. Not sure it did simplify though…
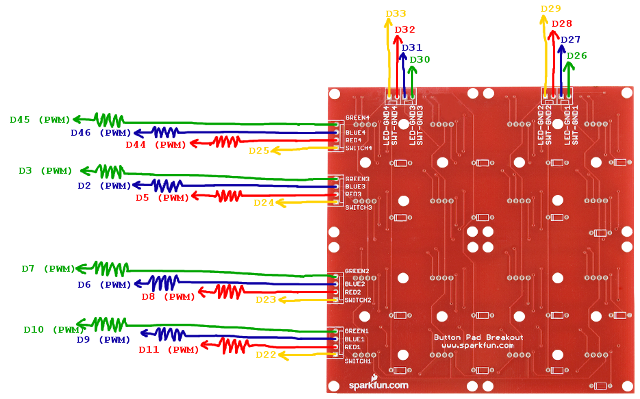
And PWM pins have been chosen precisely because you don’t want to use pins 4 and 13… More on this here.
And last, resistors for the leds are 150Ω, 100Ω and 100Ω for red, green and blue pins.
Now, the Music Maker
The Adafruit’s Music Maker is based on the VS1053 chip which has 2 main functions : MP3/WAV/OGG… player and MIDI synth. It comes with a handy SD card connector from which it can read files to play. It comes in several flavors :
I chose the latter for two reasons : I liked the idea of having an onboard amp so it would simplifiy cabling and I thought I could stack it onto the Mega. But… as it is using by default PWM pins I desperately need for controlling the leds, I had to re-cable everything to new pins. In addition, I could not stack it anyway because I needed all the space on the Mega proto shield as you’ll see later on.
So, in the end, if I had to do it again, I would probably get the breakout board (smaller, much smaller) and the 3W amp separately.
Here are the connections
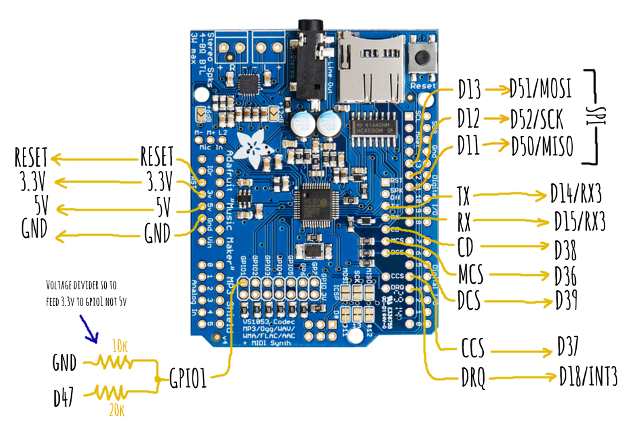
Schematic based on Adafruit’s Music Maker catalog product photo
Note the little voltage divider to feed GPIO 1 on the VS1052 : the VS is a 3.3V device so feeding directly with Arduino’s 5V may (will) damage it.
Then the accellerometer
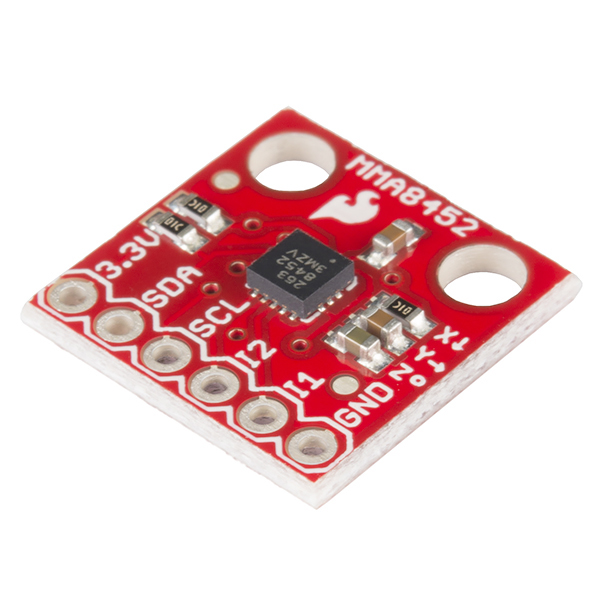
I choose a cheap 3-axis, I2C capable accellerometer breakout : the Sparkfun’s MMA8452 breakout board.
It has some nice features and can make use of 2 interrupts… but I only have one available… So the other one won’t be connected for now. My first version of arduino code won’t make use of any of it for now. So it does not matter. I did connect one… just in case I have an idea on how I could use it !

Schematic based on Sparkfun’s catalog product photo
Let’s continue with the encoder
The Sparkfun’s encoder is a bit tricky because documentation is not quite clear but in the end… it works !

Note that it is a common anode RGB led. Setting pins D12, D13 or D14 to 0 means ON and 255 means OFF !
And last, resistors for the leds are 150Ω, 100Ω and 100Ω for red, green and blue pins. Also, pull-down resistor for the switch is 10kΩ
Let’s finish with the buttons
And now the very last thing : the illuminated buttons.
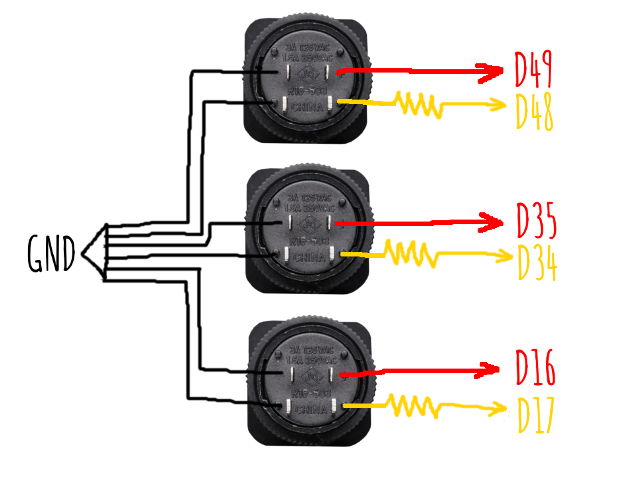
Schematic based on Adafruit’s catalog product photo
Have 3 of them. Quite straight forward… just don’t forget 150Ω led resistors.
Wrap up
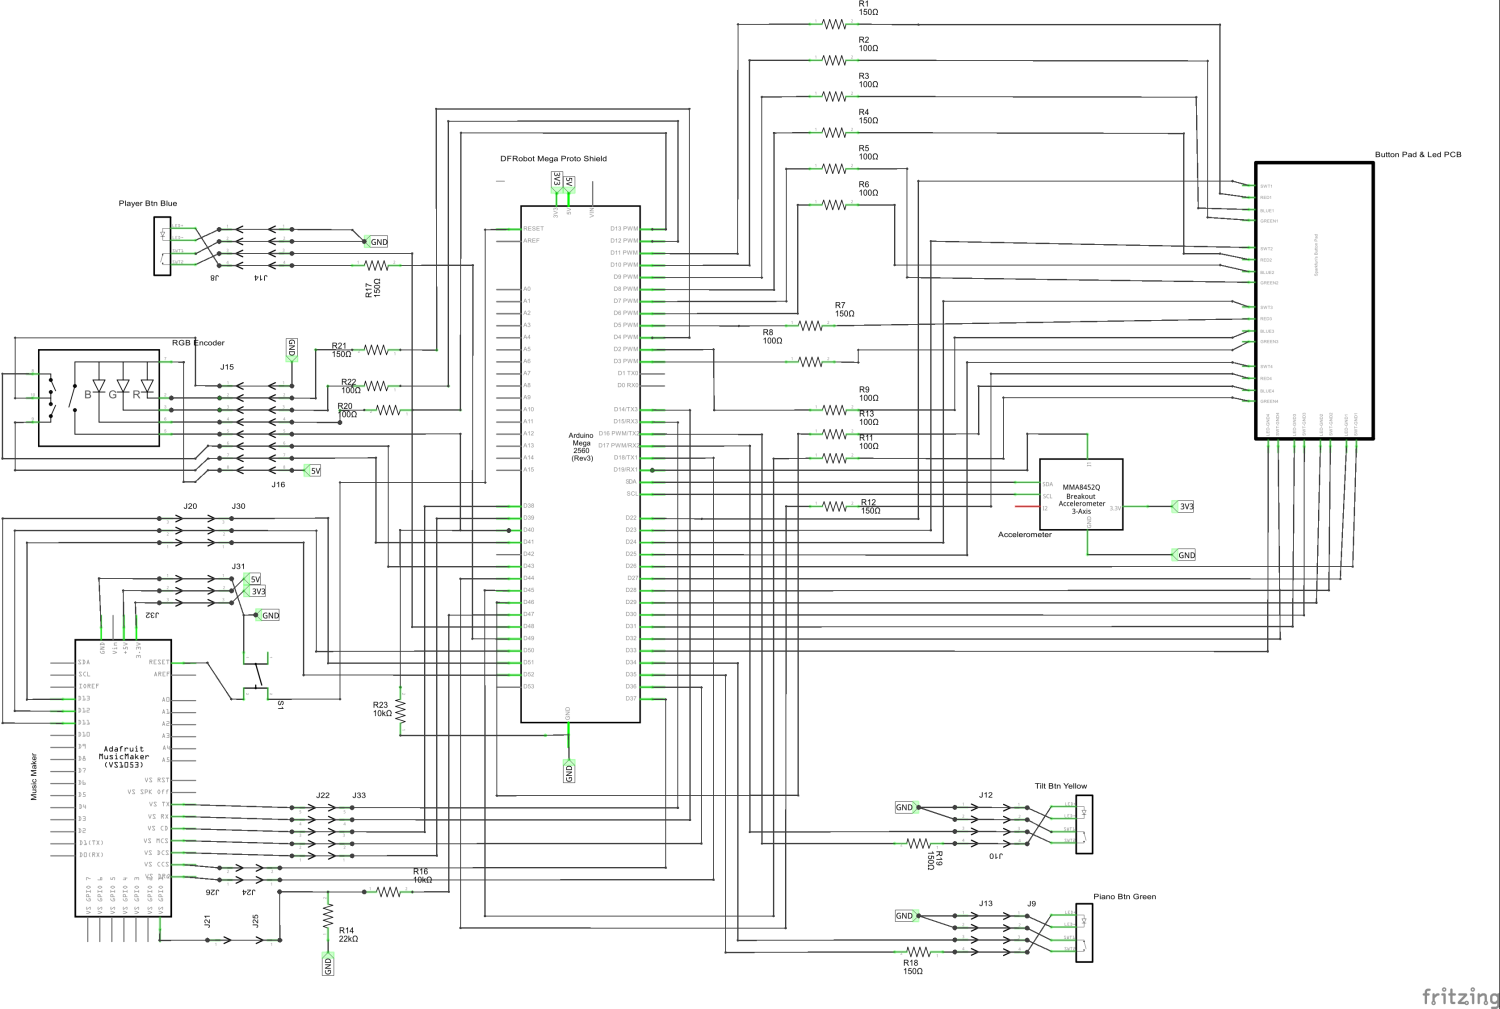
Ok… all parts have been connected one by one, here is the full picture !
And what about Arduino code
All is here on GitHub : https://github.com/jsiobj/NoeSoundBox/
What’s next
In next posts, I will sho how I did assemble all that stuff and build a nice enclosure for it.